[et_pb_section fb_built="1" _builder_version="4.4.0"][et_pb_row _builder_version="4.4.0"][et_pb_column type="4_4" _builder_version="4.4.0"][et_pb_text _builder_version="4.4.0"]
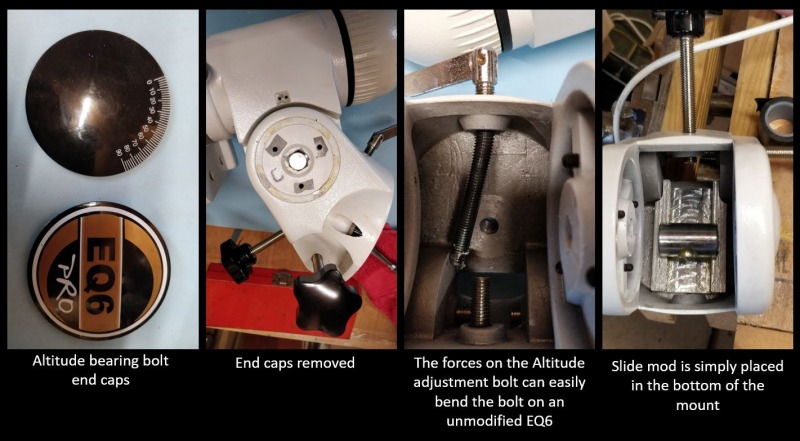
The EQ6 hyper tune is a procedure to strip down and rebuild your mount to improve performance, the exact details are best followed from astro-baby.com so I won't copy them here. The tune-up includes replacing the plastic shims and replacing them with PTFE ones and replacing the bearings, I replaced the small worm gear bearings and cleaned and re-greased the large bearings.
The best attitude to take when doing this modification is slow and deliberate, if something is not going well or as described in the instructions the best course of action is to stop, have a cup of tea, re-read the instructions and try again.
I took the time to make-up an EQ6 tool set, this includes all the tools needed for the hyper tume, most are common tools you are likely to have available such as screwdrivers and allen keys, the two less common tools are the metal band oil filter wrench (available from Halfords) and the worm bearing cap and retainer removal tool (available from Rowan Astronomy - makers of the EQ6 belt drive mod) the latter you can get away with pointy nosed plyers but you are more likely to scratch the caps without the tool.
[/et_pb_text][et_pb_text admin_label="Tools image" _builder_version="4.4.0"]
[caption id="" align="aligncenter" width="800"]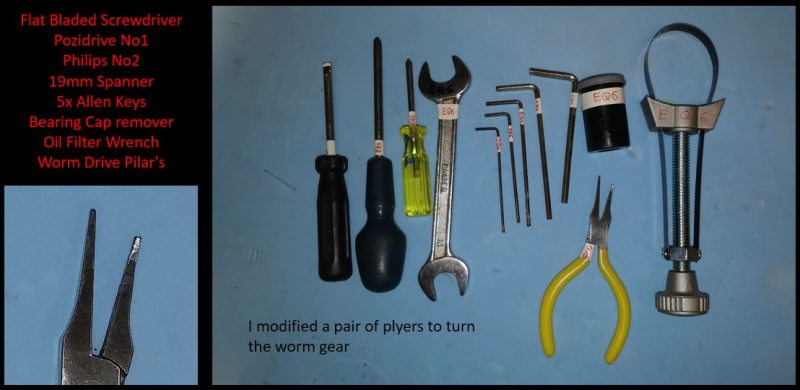 All the tools needed for a strip-down and rebuild of the EQ6 mount. A long flat-bladed screwdriver, digital micrometre and locking tweezers are also useful but not essential.[/caption]
[/et_pb_text][et_pb_text _builder_version="4.4.0"]
The strip-down and rebuild took a total of 20 hours, requires a lot of space and somewhere reasonably clean to lay everything out. It is straightforward if you are mechanically minded, but is a large commitment of time.
To complete the hyper tune required the following parts and consumables.
- 2 rolls of paper towels
- 2L of white spirit
- old tooth brush - for cleaning parts
- clean containers - e.g. ice cream tubs for cleaning parts
- lithium grease for re-greasing bearings and all parts
- PTFE shims of various thicknesses to replace the plastic shims
- New bearings (I just changed the small worm gear bearings)
Expect to spend about £60 on these parts
[/et_pb_text][et_pb_text admin_label="parts" _builder_version="4.4.0"]
[caption id="" align="aligncenter" width="800"]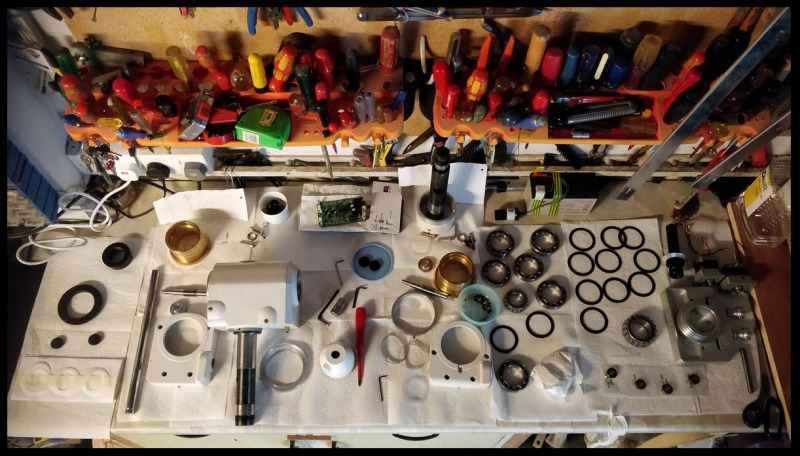 EQ6 parts laid out on the workbench, note the old (bottom middle) and new PTFE shims (bottom left)[/caption]
[/et_pb_text][et_pb_text _builder_version="4.4.0"]
There was a lot of dirt and grit in the main bearings, quite how this gets in, given they have never been taken apart, is beyond me. To re-grease them requires removing the bearing caps that seal the bearings in, this was done using a modified modelling knife. The bearings were then de-greased using white spirit, the process of removing all the dirt from the bearings took a long time, we kept spinning the bearings in the white spirit to dislodge the dirt until no bits were visible in the pot, regularly changing the white spirit. They were then left to dry naturally on paper towel and before re-greasing were warmed with a hot air gun to ensure all the white spirit had evaporated.
[/et_pb_text][et_pb_text admin_label="cleaning parts image" _builder_version="4.4.0"]
[caption id="" align="aligncenter" width="800"]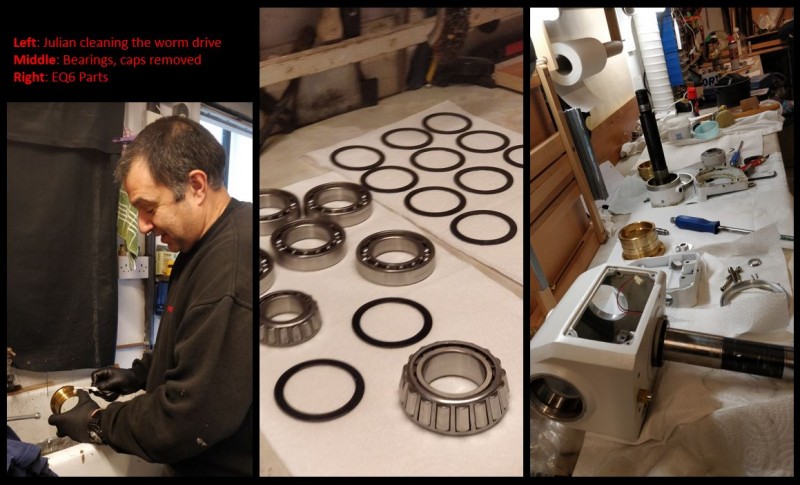 Cleaning all the parts[/caption]
[/et_pb_text][et_pb_text _builder_version="4.4.0"]
Any parts that required cosmetic repairs were repainted and I also replaced all the rusty screws with new ones.
When we reassembled the EQ6 the Declination worm felt 'notchy', so we took the EQ6 apart again and inspected the worm gear, it had a small surface scratch, almost too small to see, but this scratch was getting amplified in the mount, so we polished it out using 2000 grip emery paper on a lathe (you could probably do this in a drill if you don't have a lathe), this cured the problem.
[/et_pb_text][et_pb_text admin_label="worm gear repair image" _builder_version="4.4.0"]
[caption id="" align="aligncenter" width="800"]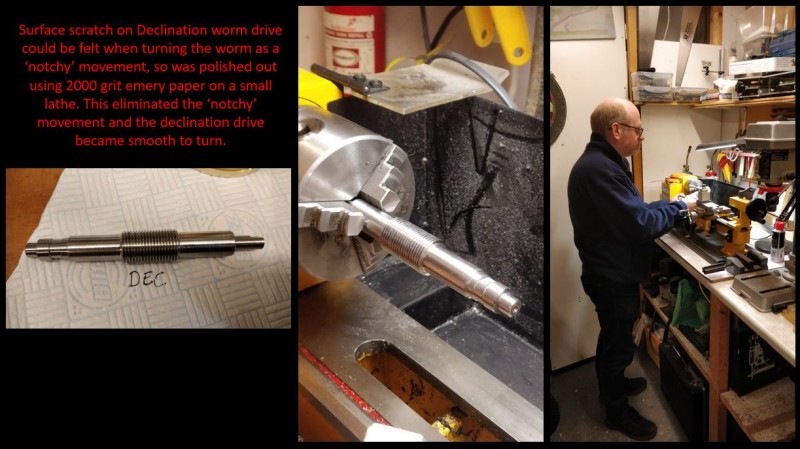 Declination worm gear being repaired on the lathe, which was simply a matter of polishing out a surface scratch.[/caption]
[/et_pb_text][et_pb_text _builder_version="4.4.0"]
A massive thank you to Julian Tworek for offering to help complete the hyper-tune, Julian's patience, experience and perfectionism is exactly what is required to complete this project successfully.
[/et_pb_text][/et_pb_column][/et_pb_row][/et_pb_section]
 looking at the spectrum[/caption]
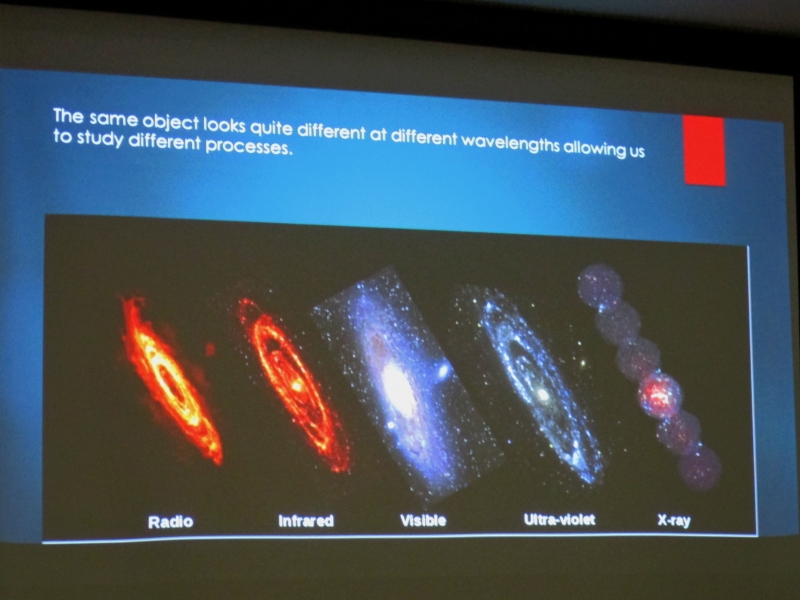 Objects viewed in different wavelengths[/caption]
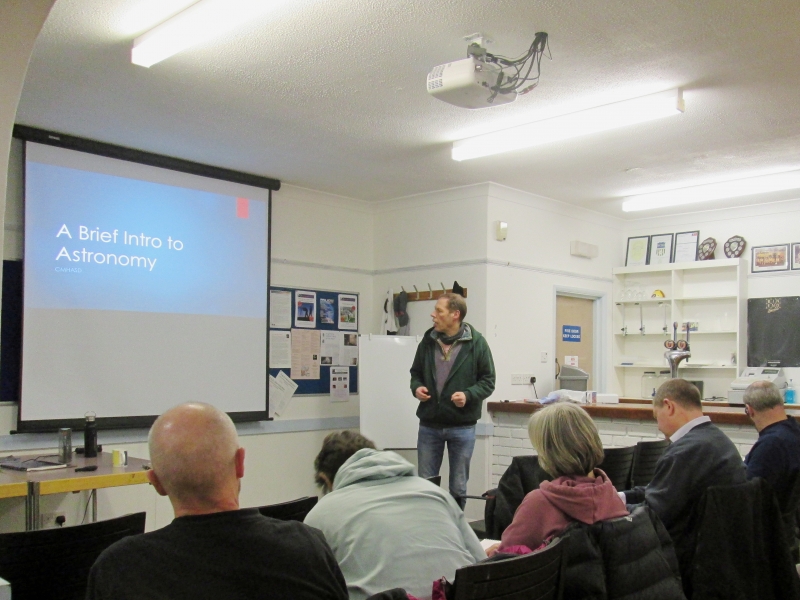 Martin introducing the course[/caption]
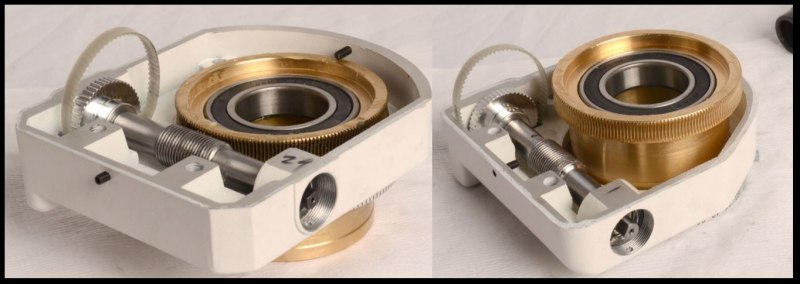 The EQ6 Belt mod replaces the brass gears with a timing belt to reduce errors and remove backlash.[/caption]
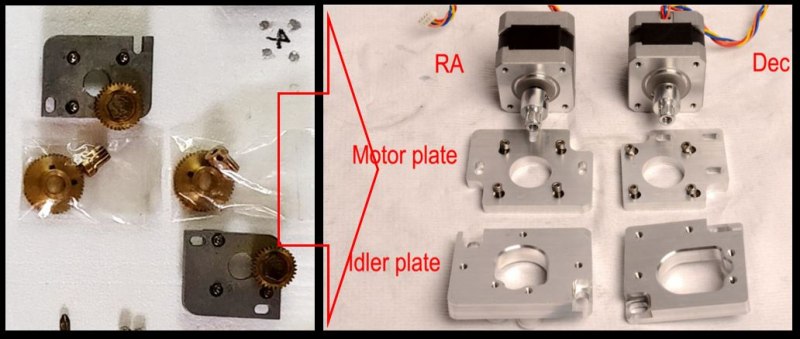 The old and new parts[/caption]
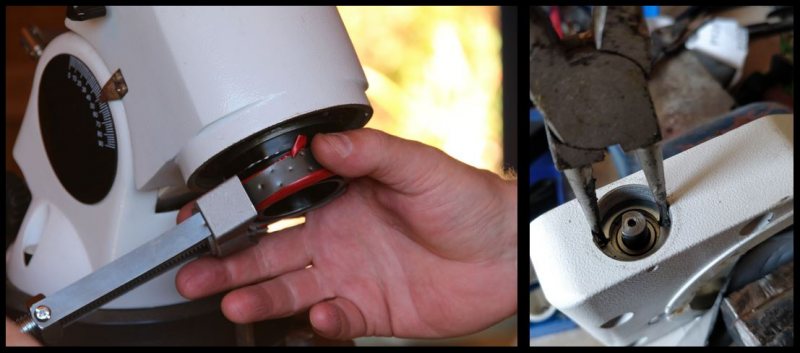 Some of the tricky steps[/caption]
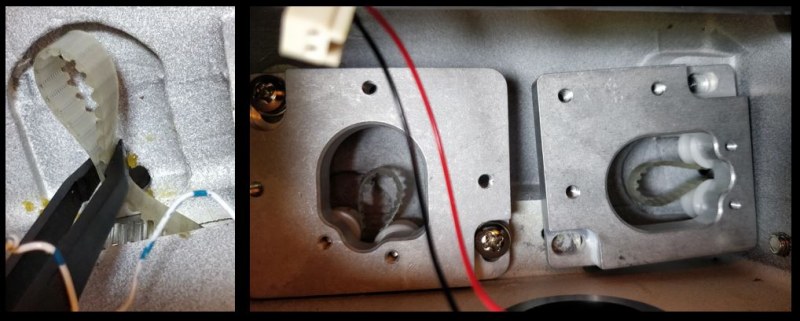 Threading the belts through the guides can also be tricky, locking tweezers help a lot![/caption]
 The disassembly required to fit the belt mod.[/caption]